Thursday, September 10, 2009

Hops Harvest 2009


Hops Harvest 2009
by Mel Smith

It's Thursday, September 10th 2009 and the hops harvest is just beginning here in Sauk County, Wisconsin. My Hallertauer were the first to be ready to pick. I only have two vines and they are in their second year. I only harvested 2.1 oz. of those on Saturday, dried weight. A friend from the DUFF club shared some more Hallertauer with me - from the parent stock of my Hallertauer - and that amounted to 5.3 oz, so my total of Hallertauer for 2009 will be 7.4 oz! Wonderful!

The big harvest will be the Cascade. I planted three varieties of hops around the 21st of April, 2005. The Cascade have always grown the best, so I moved a few rhizomes (three each) of the Willamette (east side below the house) and the Glacier (West side below the house) up the hill near the Cascades to see if they would do better at that location. That move was made in 2008. I also expanded the Cascade plantings with a dozen more rhizomes taken from my own plants and I added Hallertauer hops from the father of a friend I work with. I also cleaned out the tree row and trellised the original Willamette and Glaciers a little better and they have done better this year, so I expect a little harvest from three varieties and big harvest from the cascade.
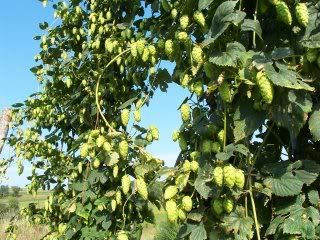
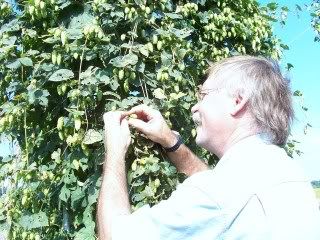
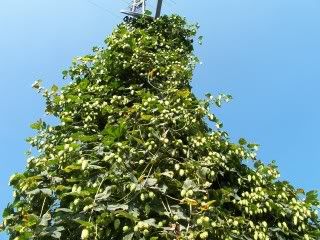


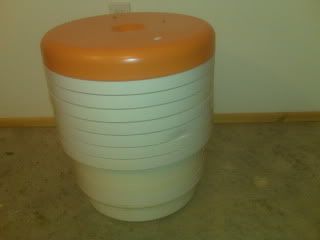
I picked cascade for several hours this evening. In the photos above you can see the mountain of hops growing around the tv tower and this was the main place where I picked. I put two buckets full of hops in the dehydrator which is actually two dehydrator trays stacked together. They've been drying since 5:00pm this evening at about 100 degrees. I'm never sure when the hops are really ready to pick. In the bucket, you can see some of the outer leaves beginning to turn brown and I think that's a good indication that they are ready. In some of the hops, I'm more sure that they are ready because they are light and papery. I'm concerned that I don't pick them too early and get a grassy taste.
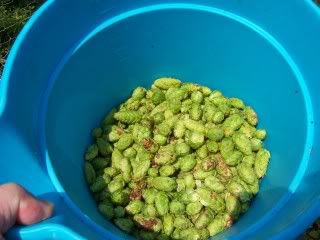


After I put the two buckets full in the dehydrator, I picked 6 or 8 more buckets. I lost count. I put all of these extra hops on a plastic mesh over some wire shelving suspended between a table and the window ledge. I have a fan blowing underneath and another blowing over the top but no heat of course. I wanted to get these started drying, at least, and I'll finish them in the dehydrator. There's a lot more to pick.
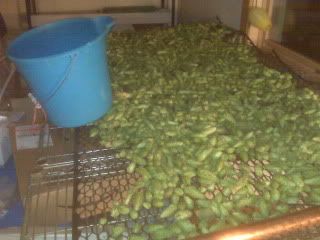
Last year I made the mistake of cutting the vines and bringing them indoors in plastic containers. I didn't get to them as quickly as I had planned and when I finally did, many of the hops had developed mold. Even loosing those, I still harvested over four pounds in 2008 and I have hops left over. I want to be more careful this year and bring the whole crop to harvest, so I have more hops to share.

I really love the smell as I pick the hops, and when I go down in the basement... ahhh! It makes me want to brew a big IPA.

Wednesday, October 29, 2008

Cranberry Wine

Cranberry Wine 2008

by Mel Smith


I received about 25 lbs of Cranberries from a friend that works in the cranberry bogs during harvest (picked up and delivered to me by another friend) on Thursday evening October 23, 2008.


On Saturday evening, I cleaned the berries. I spent two or three hours rinsing and picking stems and leaves from the berries. The weather was cool, probably in the thirties or even the twenties at night, so I left the pale of berries outside during this time.


On Monday evening October 27, 2008 I spent another 5 or 6 hours sorting out the white or light colored berries and putting the good ones through the food processor. I tried to chop them as course as possible while still making sure every berry was cut some. They were about the coarseness of coleslaw and I placed them in my 15-gallon fermentor.


(The picture of the white berries in the bucket are the ones I threw away. I kept the redder berries and the ones with no soft spots but with all of those berries, I wasn't overly particular.)


This is approximately the recipe I used.


20-24 lbs of fresh Cranberries (Stevens variety) coarsely chopped

6 lbs. of Golden Raisons whole

21 lbs of granulated sugar

8 campden tablets - crushed

7 teaspoons of yeast nutrient

5 teaspoons of yeast energizer

2 teaspoons of pectic enzyme

9 teaspoons of acid blend

7 gallons of water


Everything was placed in the primary fermentor and stirred well. The picture of the blue fermentor with a few berries in the bottom as I began my project of sorting, chopping and adding the other ingredients to make the cranberry wine.


24 hours later, I added

Lalivin K1-V1116 Champaign yeast, 2 packets


The following evening 10/28/2008 23:30 pm I hydrated 2 packets of Lalivin K1-V1116 Champaign yeast by pouring them into a bowl of 101 degree water and leaving sit for 45 minutes. I had planned for only a 15 minute hydration, but at 15 minutes and then at 30 minutes I still had a little pile of dry yeast floating in the water. Each time I jiggled the bowl until I thought the yeast was all wet, and then set my timer for another 15 minutes. That’s how it ended up taking 45 minutes to hydrate the yeast. I then poured the hydrated yeast into the primary fermentor and stirred the mash briskly.


I had stirred the must before adding the yeast and tested the specific gravity. It was slightly lower than I wanted 1.104 instead of the 1.110 to 1.115 that I was shooting for, but I think that is O.K., as I will have to have more sugar additions anyway. I’m using a Champaign yeast but know people prefer a sweat wine, so it will take a lot more sugar and be a high alcohol wine before it becomes a sweat one. Also, I have heard that if the must is too sweat, the yeast might have problems taking off, so I am O.K. with the 1.104 original gravity.


During the next five to seven days, I will stir the must daily, watch for signs that fermentation has began, and try to plan how to squeeze all the juice from the fruit when its time, but that is all for tonight. I'm going to enjoy a glass of mead I made in January of 2007 and turn in for the night.

Thursday, October 16, 2008

The Coolest Beer Club Ever!

If you could imagine the coolest beer club ever, what would it be like? I asked myself that question as I thought about where DUFF Club is going in the next few months, the next year, the next five years and beyond. Technically, I suppose it’s called a vision or mission but really all it comes down to is this, what would the coolest beer club ever look like and how can we become that club?


First equipment, I think the coolest beer club ever would have some really cool equipment that members could use just for being members of the club. This would be stuff that one person alone might only be able to dream about having but the club would have it all, and members could use it or rent it sometimes.


The equipment might be acquired by group efforts, combined talents, or pooled resources. One member might have a source for stainless steel, another might have the equipment and knowledge to cut and weld, and a third might have the engineering skills to design and draw up the plans for an item. Together, a team might be able to achieve things that any one person working alone would find hard to do. Another option is simply to purchase items as a group.


This equipment would help its members brew the best beer and wine ever and win awards! It could also help the club raise money without the need for charging membership dues by charging rent on some of the equipment.

Second supplies, I think the coolest beer club ever would help its members acquire brewing supplies as a brewing co-op. Group buying, bulk buying, and ever alert for sales and good deals would help defray hobby costs for its members. Rather than just paying dues to be a member of a club, being a member of the coolest beer club ever would be a financial asset for its members.


Next education and encouragement, I think the coolest beer club ever would be a source for knowledge about brewing high quality homebrew. Their education program would help initiate new brewers and hone the skills of the experienced ones. Through challenging competition and on-going education, members of the coolest beer club ever would win awards, have beers named after them, and have Samuel Adams calling up for advice on how to brew better beer!


The coolest beer club ever would definitely write a book that may or may not make it on the New York Times bestseller list. Probably not, but who is to say? Many church groups, school music departments, and even families publish their own cookbooks, why shouldn’t the DUFF beer club? I think we should begin saving our great beer recipes, great brewing stories, and unique brewing tips and tricks for the book! I believe this might be a unique way to raise money in the future, selling on ebay, area brew stores, and at competition events.


As I think about the future, I would like the DUFF Homebrew Club to become a club that is a real asset to be our members because it will help them to make great homebrew, give everyone access to equipment that they could not afford on their own, and help hold down the costs of our hobby. We will also share our knowledge, experience, and encourage others in becoming great homebrewers.


Some people live by the motto, “If you can’t learn to do something well, learn to enjoy doing it poorly.” A funny saying but too many folks (myself at times) take this funny saying to heart and give homebrewing a bad name! The DUFF Homebrew Club should be all about learning to enjoy doing our hobby really well. We have some great brewers in our midst, and I hope I can be counted in their number someday.

Monday, August 25, 2008

California Common

I spent the night of August 22 cooking beer. It took longer than usual because it’s been several months since I made beer and all of my equipment had to be thoroughly cleaned; and that, after I found each piece! Notice my official DUFF Club brewing hat as I add water to the kettle, it adds that... 'something special?' to my home brews!

On Friday night, I made a peculiar kind of beer called California Common. It’s one of the few beers that is uniquely an American contribution to the beer world. California Common was called Steam Beer in its early days but today’s style, epitomized by Anchor Steam Beer, is superior to its cheap progenitor.

California Common style beer is made by using lager yeast but at the higher temperature typically used to produce ales. This allowed San Franciscans to enjoy a lager beer of sorts before refrigeration came to the west coast of America, and it allows home brewers today to do the same, make a lager beer at ale temperatures. A cool basement is all one needs for the perfect environment to brew California Common style beer.

I have the lager hole! The lager hole's first purpose was for a sump-pump in my basement, but the sump pump hole has only had water in it twice since we built the house seven years ago, and we never bought a sump pump. In the winter, the temperature in the lager hole is 53 degrees, perfect for making a real lager beer but now at the end of August, its up to 64 degrees, a great temperature for making California Common beer.

So there's my carboy, down in the dark cool hole in the basement floor. The wort is alive. It's a world of water, sugars, hops, carbon dioxide, and a growing population of alcohol. There is a frothy head of foam over a floor of yeast in

that reddish-brown
world-of-wort. Chunks of 'stuff' driven by bubbles of CO2 are propelled toward the surface only to be caught by gravity and pulled back to the bottom of the carboy. Yeast rules in the little world of wort.


I used Wyeast 2112 California Lager yeast, a smack pack. I pulled it from the fridge and activated it on Thursday night, a day before I brewed the beer. By early Saturday morning when I finished cooking, the packet was full and tight with pressure. I pitched most of the yeast in the freshly cooked and cooled wort, but I snitched a little tablespoon or so, and put it in an old White Lab bottle.


By Sunday morning, I finished making a crude stir plate. My stir plate is made from an old transformer, a D.C. voltage converter, an old D.C. portable heater fan, and a cow magnet.

I also incorporated 3 of my wife's coffee cups and a little cutting board. It's not a very fancy set-up, but it is stirring the yeast and it hasn't burned the house down... yet! It's held together with electrical tape, spring clamps, hot glue, and the force of gravity! I tried to buy a real stir plate off from ebay last night but lost that action. I'll keep trying as I think my wife wants her coffee cups back.

For now, it looks like I have a pretty good start on my first batch of California Common Home brew for the competition next April and a few billion more cells of California Lager yeast for when I try my next all-grain entry. Cheers!

The hobby of home brewing is more than just a quest to make great beer and wine, it's a chance to experiment, invent, enjoy friends, and most of all to have fun. Never forget to have joy in your life and especially have joy in your hobbies.

"Bless the Lord, Oh my soul... He causeth the grass to grow for the cattle, and herb for the service of man: that he may bring forth food out of the earth; and wine that maketh glad the heart of man, and oil to make his face to shine, and bread which strengtheneth man's heart." Psalm 104: 1-15


blogger templates | Make Money Online